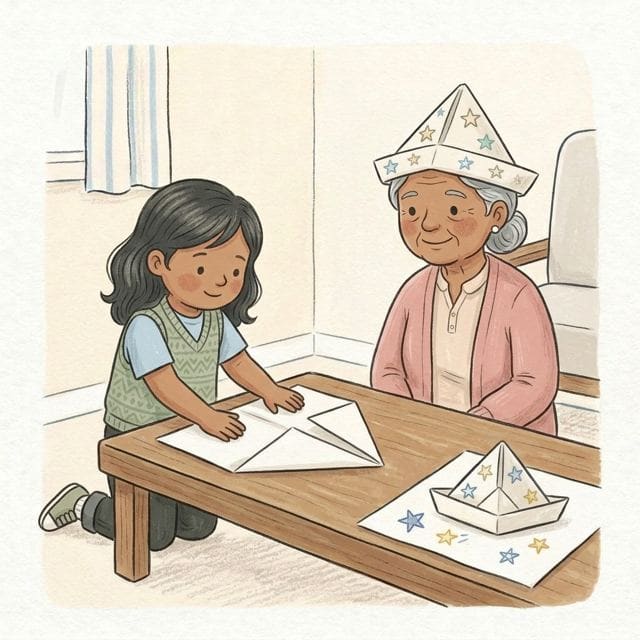
Paper Hat Folding
What you need
- a big sheet of plain paper, about the size of a newspaper page
- masking tape
- crayons or stickers
How to do it
- Fold the sheet in half from top to bottom together, pressing the fold flat with your hands.
- Fold the two top corners down to meet in the middle, so it makes a point like a roof.
- Fold the bottom strip up on both sides and tape the corners, and you have a hat.
- Decorate it, put it on, and decide who's wearing it: a pirate, a captain, a king or a queen.
Why it matters
Each fold needs edges lined up and pressed flat, careful work that ends with something they can wear straight away.
What they're learning
- Lining up edges
- Corner to corner before pressing.
- Pressing a crease
- Running a thumb along the fold.
- Following steps
- Fold, fold, fold, tape.
What to look for
Notice them running a finger along a fold to make it sharp.
A tip
Plain paper or wrapping paper works best; a sheet that's too small makes a teddy-sized hat, which is fine too.
Make it easier or harder
Easier: you fold, and they press every fold flat
Harder: make a smaller one for a teddy from a smaller sheet
More like this

Browse
Fine motor activities · Toddler activities with paper · Toddler activities with masking tape